Showing posts with label Modeling. Show all posts

Wednesday, 18 June 2014

Lowering the Poly-count

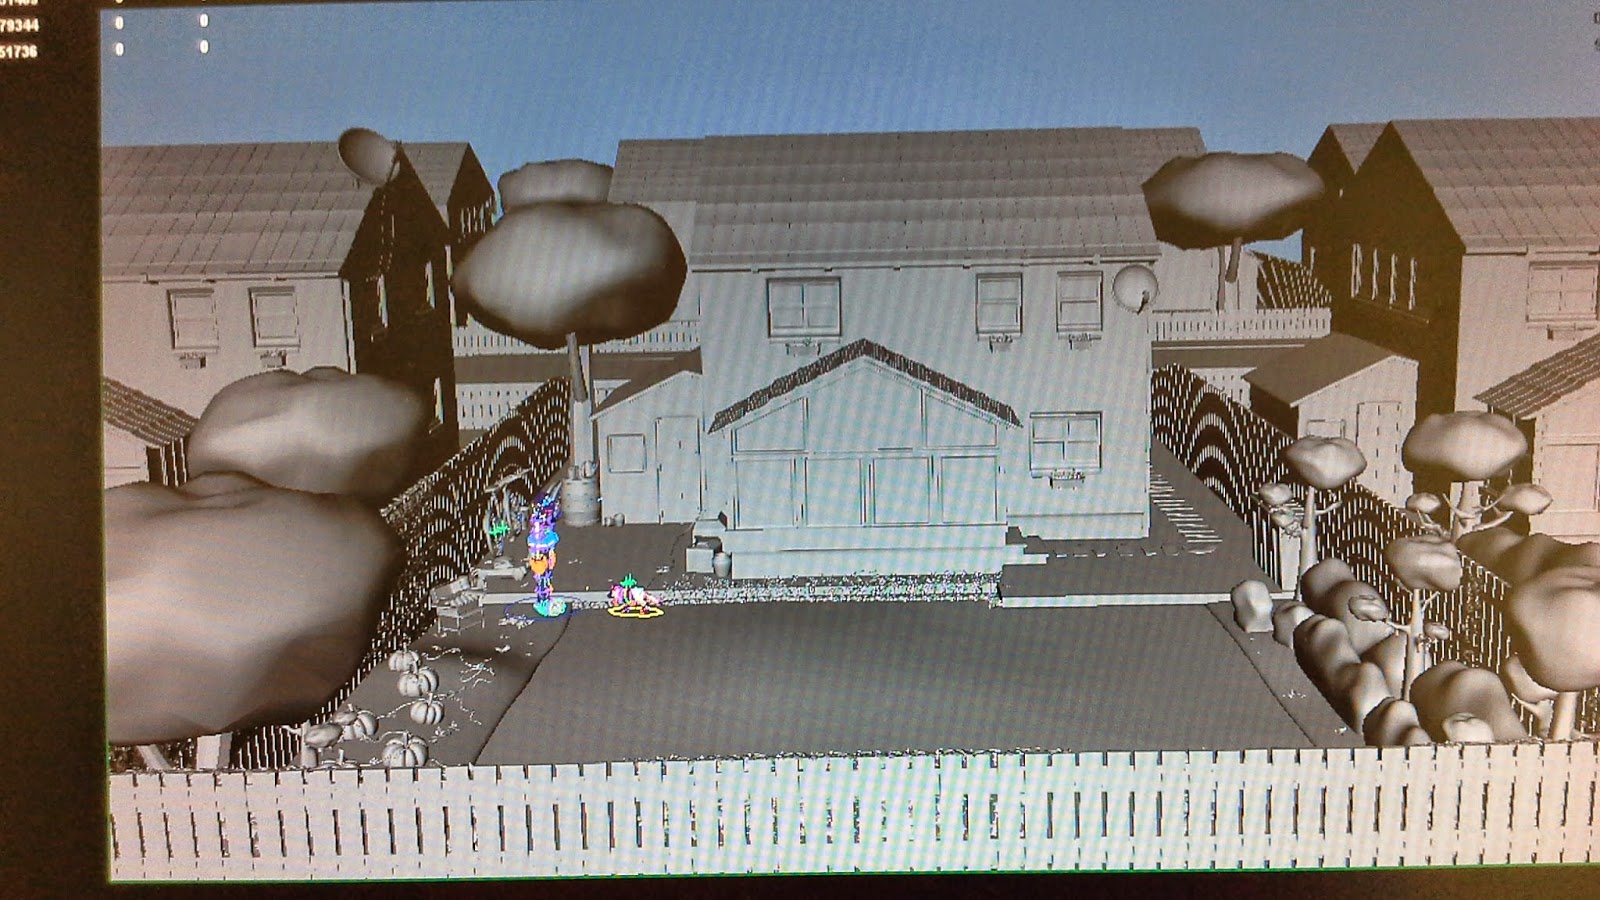
My laptop continued to crash as long as I opened the Environment Maya file. So, Lily and I decided to lower the poly count. She had a look at it and together, we saw places where we could lower it.

We decided to remove the paint effects plants(which I never liked). They had an eccentric poly-count.I replaced them these plants.


I also changed the placement of some plants to suit more to our shots.


I removed the sun over the fluffy cloud and added another cloud. The front fences were aligned. Also, the bushes looked a bit too neat. So I had to make them look haphazard.


I had forgotten to model a few of the props. The saw, hammer and the bird-feeder.


The environment is ready but because there have been so many changes. I will need to Layout the scenes again. Also, I can only proceed with the lighting only when the texturing is complete.

Wednesday, 11 June 2014

Layout for Shot 1

Shot 1 starts with the name of the film with a few clouds in the sky. Rough

clouds were just made for the animatic. So, I modeled a few new fluffy clouds and also set up a sun.


There was a lot that needed to be added in, as it is an extreme long shot where the camera pans down to reveal the entire set where the action takes place. I added a lot of houses that could be the prospective neighbours for our Owner and her dog.


Monday, 9 June 2014

Chirpy ready for rigging!!

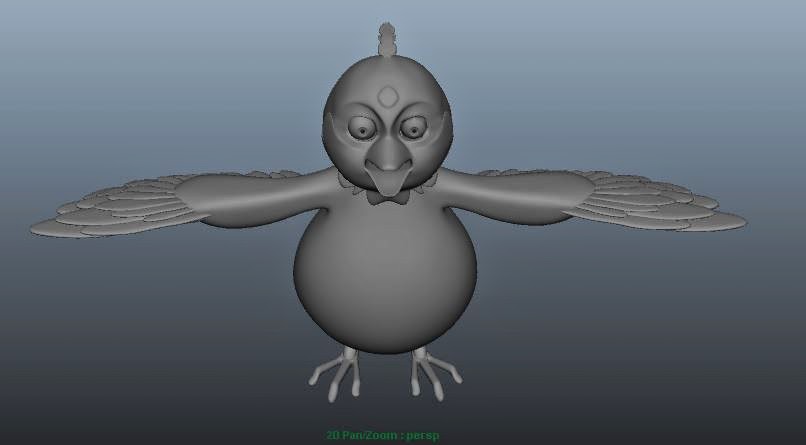
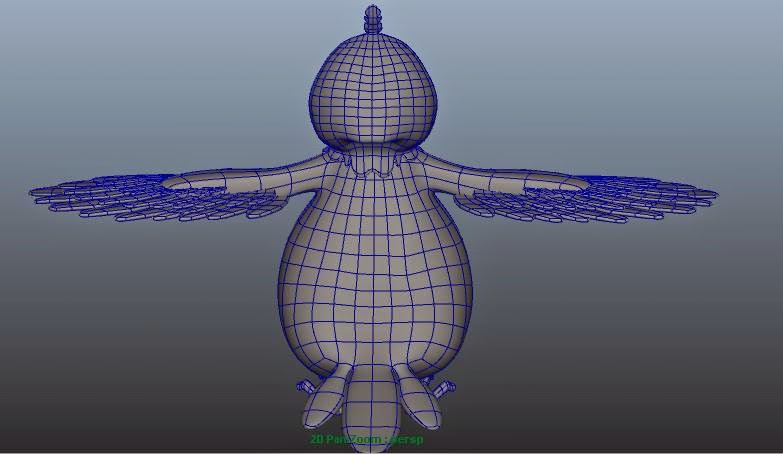
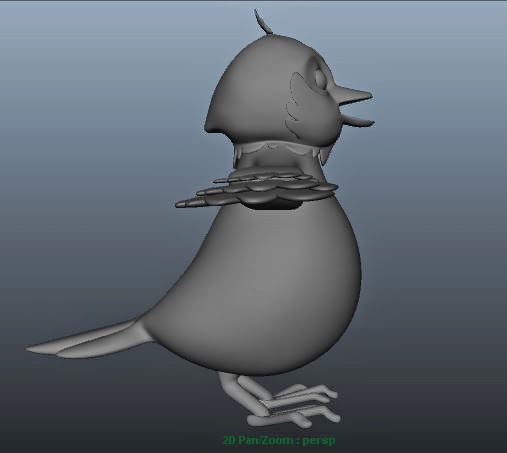
Here, are few images of Chirpy with her Topology. George and Lilly had pointed some changes which have corrected in this final model.


 I  had modeled the wings back to front. So I changed that.


There were a few additional faces that needed deleting. Lilly helped me locate them. 


Her feet were quite webbed. So that was also changed.

She is complete!!

Thursday, 5 June 2014

Chirpy's Body and Wings

I started modelling the body and wing area which did not seem difficult when compared to her head. I thoroughly enjoyed making her wings and adding the feathers. Sheng's art had one layer of feathers. However, I though her wing looked very bare so I decided to add three layers to give her a fuller wing.


I had thought,I just need to stitch the second half of the body and the bird will be ready to rig. However, Lilly and George pointed out some minor changes that I will hopefully complete within this week.


Tuesday, 3 June 2014

Chirpy's Head

After a day's of work with Chirpy's head. This is where I left her.


 I used the same techniques with the eyes that I used for our human model Lily. However,the topology of the beak area was a challenge. I tried finding some tutorial on digital tutors but in vain. Then I just Googled for some images online on bird topology. I found references, and tried to incorporate some while used my experience for others.


 My team is very happy with the results and so am I! I especially enjoyed modelling the feathers around her face. This gives her so much character,I think.( Or, simply makes it look like a bird)

Thursday, 29 May 2014

Bird Blocking

Sheng's Character Designing for our bird- Chirpy


Blocking of the bird was pretty simple. I cut the above concept in Photoshop and imported the images in Maya. Thereafter, I created simple polygons to start detail modelling.

Monday, 26 May 2014

Garden


The Maya file of the environment has really become heavy now. Its difficult to move around the scene and my laptop refused to work if I tried to render it with high-resolution settings.So, here is a quick look of the complete environment.


However, after completing the environment,my main concern was the Layout of the different shots. Whether, the mise-en-scene had the appropriate props or they were hidden from view. So, after a discussion with Lilly it was finalised that she would upload the animatic shots and I would Layout each shot to maintain screen aesthetic. 

Friday, 23 May 2014

Pumpkin Patch

After a lot of discussion, we decided to include the pumpkin patch in the environment because we needed to fill in the space near the shed area with some plants. It was not only easier to add pumpkins and fill in the space but it matched the autumn-winter look of the film.


Friday, 16 May 2014

Garden Modelling


Since, I planned to leave early as we have the opening of the Undergrad Degree show today, I managed to model the hose pipe and the pumpkin patch only. I also made some minor changes like resizing props or readjusting their placement.

Wednesday, 14 May 2014

Adding Props to the Environment

I sent over the last update of the environment of our film to John H. I always look up to him for his suggestions. He started laughing as I had placed two satellites on the roof. So, I sifted one to the house on the left. Then, he also adviced the buildings might not have the satellite on the roof but around some window maybe. So, I shifted that too. I even changed the roof of the main building.

It is very important for our film that the house looks as British as possible.

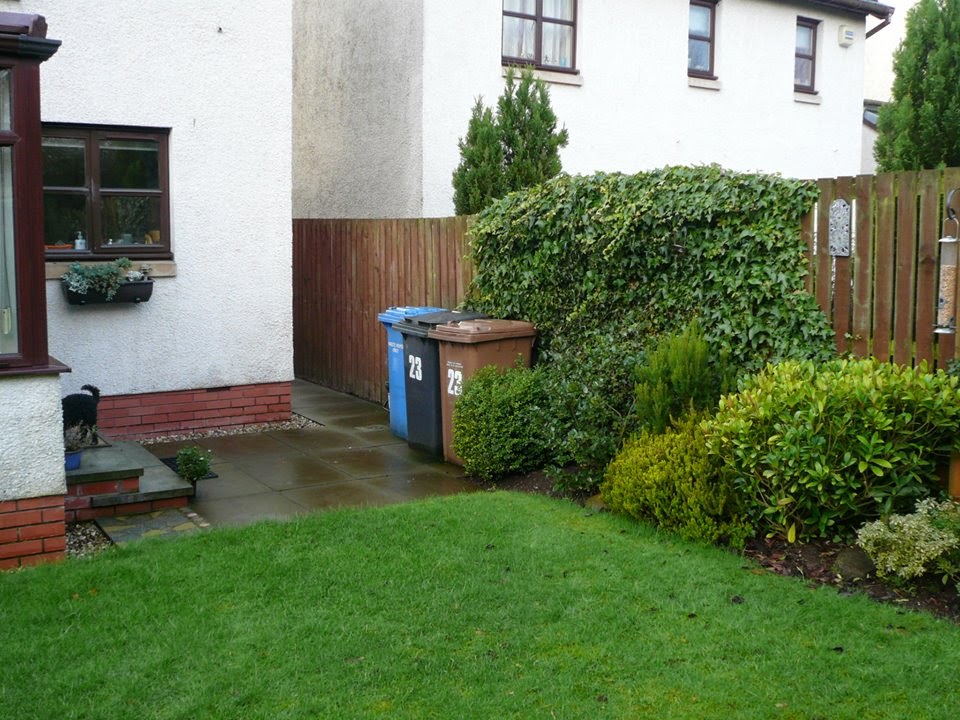
I have added a few carton boxes,guttering, a Bar-be-Que table and wheelie-bins today. However, after this render, I felt that the bar-be-que table looks a little large and the wheelie bins a tad too small. I will resize them tomorrow. 

I also intend to start some foliage building tomorrow.


Tuesday, 13 May 2014

Prop Building

After John H.'s suggestion and Lilly's confirmation today I started building some of the props.

I improvised on their suggestions and built some other stuff on my discretion. I started with the satellite. Then I built the keggel, cans, watering-cans, bicycle, extra tyres, lawn mower, rakes, unused flower pots and bucket.

I have placed them arbitrarily. However,their placement finally depends on the camera angle which will be finalised after the 3D animatic.


All my team-mates are very happy to see the clutter around the shed area.


Friday, 9 May 2014

Environment Modeling

Sheng's Concept Art

Sheng had given me a basic outline for the environment. I started improvising on it. After a few hours of struggle I decided that it would be faster to model afresh rather than struggle with the already existing models. I started with the fences.


Lilly's House Images

Then, I made the main house and its windows.Basically; I continued modelling on Sheng’s concept and Lilly’s house references. I modelled the foliage basket at the windows and a window sill for each window.
The sides of the house looked suffocating because of no windows at the sides. I modeled some on each side. The patio was freshly modeled with a door and stairs as its side exit to the backyard where the action takes place.


Sheng\s stepping stones and dustbins were perfectly modeled. I just imported them into this new file. Even the trees looked fine. They were imported too.

I uploaded a ‘first look’ images on our shared group to get some feedbacks. I got some good replies from my peers.


I am currently working on the props near the shed area as can be seen in the discussion above. I have searched for some reference images online and I am trying to incorporate what is important and leaving out any detail that might be irrelevant.


Tuesday, 6 May 2014

Prayer-wheel


Sheng's Concept Art

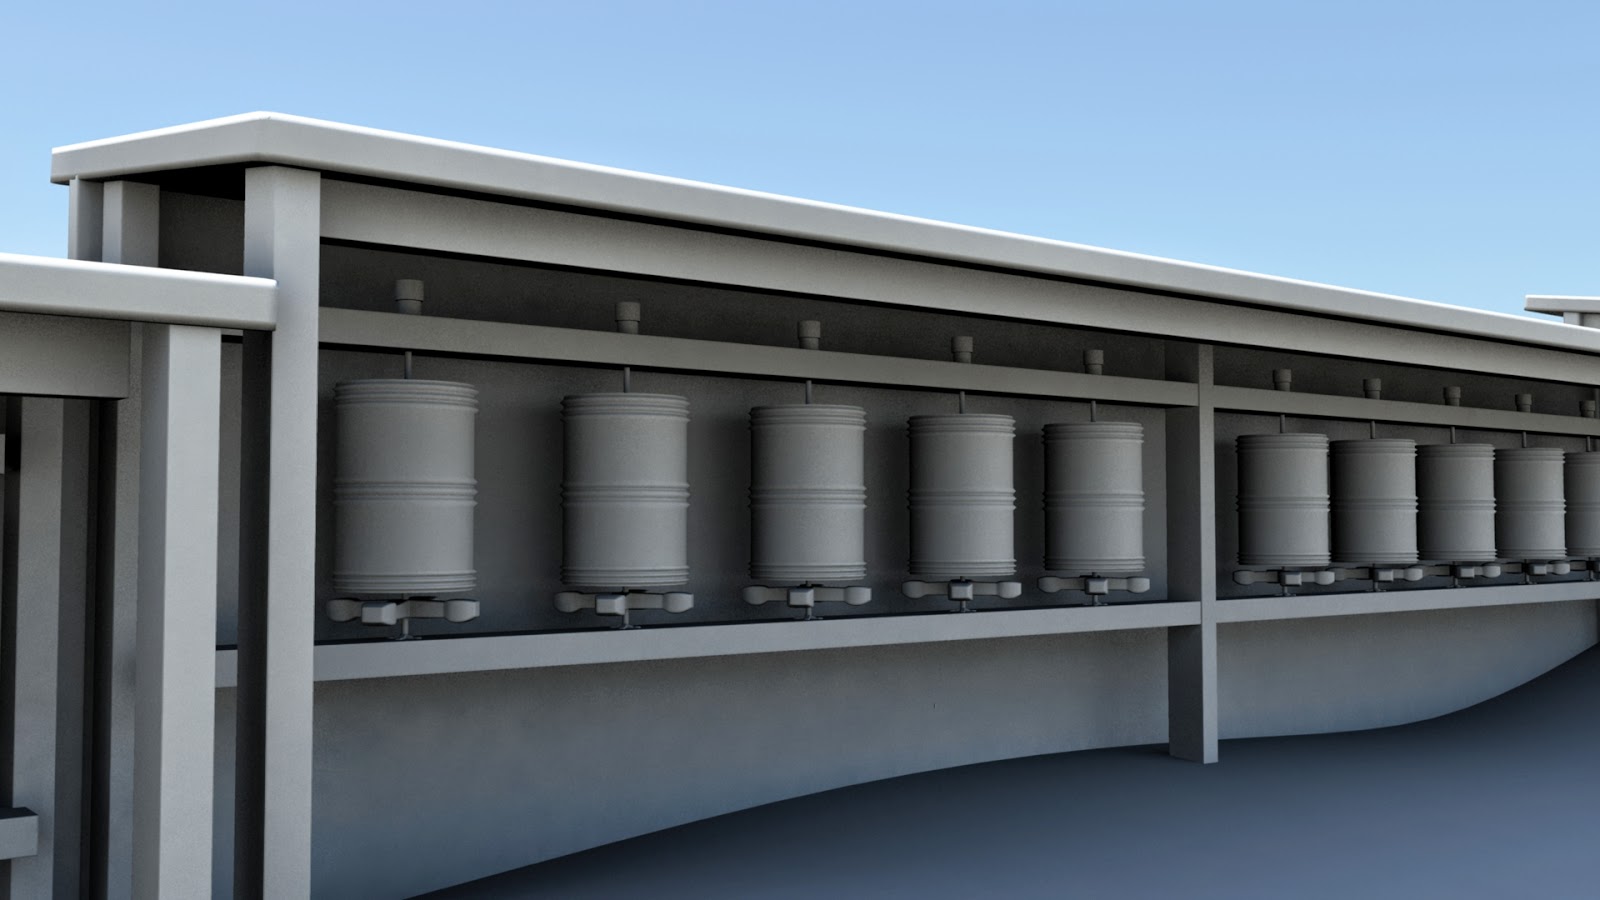
Sheng wanted a second set of prayer wheels that were different from the ones that I had made earlier. So, based on her concept and reference images I modeled this new Prayer- wheel station.


Reference Image


Friday, 2 May 2014

Lily's Topography


Earlier, I have modeled objects that were never animated. However, this time I had to model a human. It was of utmost importance to maintain the topography so that the when Lilly or George are animating them there are no inappropriate deformations.
So, I saw several tutorials on Digital Tutors that would help me through with this.

Hair- I saw a tutorial of Maya Hair that seemed quite fascinating. I did give it a try. So, I started modelling with a NURBS sphere for the hair shape. Somehow, I was not getting around to even developing a basic shape. Then, Kieran showed me how he had modelled hair from polygon in his undergraduate project. That sort of helped. I started with a polygon sphere and then changed its shape bit by bit. The major changes for the hair were its pony-tail and the band that ties it. The pony-tail that I had modelled earlier was rigid-looking and the band was a separated piece of polygon. The ridges in the hair-shape were also deep so I had to reduce that. Now, the pony-tail looks fluffier and realistic.


Earmuffs- The ear-muffs were a last-minute addition. I used a NURBS sphere to model it first but later on moved to the most reliable method of modelling- polygon. It was modelled really quickly but looks smashing nevertheless.


Face- Modelling the human-face was the biggest challenge of all. If the topology was in any way not correct then the animation would not touch the audience. The eye-socket area was a challenge because the tutorial that I had initially followed was that of an alien (Haha!). Later, Lilly found me a tutorial for creating a young girl. So, following the alien tutorial I had created the eye-lids separately. Here, the eye-lids are a part of the face mesh.
Apparently, the mouth-area was the most time-consuming part. Different people had different opinion on the shape of the lips. I modelled it several times. Finally I settled on just a basic shape. Then, it was important that the lines edges from the eyes merged with the mouth area so that the deformation wouldn’t look unrealistic.
The modelling of the ears was very basic. However, it was later of no use as we added an ear-muff.


Eyes, Eye-lashes, Eyebrows- As mentioned earlier, I had referred to the Alien making tutorial, thus, the eye was modelled according to how the alien might look! I modelled a fresh pair from the other tutorial that Lilly sent me. The new eyes not only look befitting our your character but also has beautiful eye-lashes that add to her look. The eyebrows were modelled separately so that the character could be more expressive. Also the eyebrows were trimmed and tweaked to look more appropriate.


Teeth-Gum-Tongue- Following a separate tutorial this set of teeth was modelled. The width of the teeth was changed several times. The end of the tongue was made to tilt downwards,more in tandem to a real mouth.


Snood- The snood was modelled n number of times. I made the first one with NURBS Curves and then lofting them to create a wave sort of material representing the crease of the cloth. Despite it being made by the NURBS curves, it looked rigid. So, I created a second with another NURBS primitive. I was going nowhere with the NURBS modelling tools. Finally, I used a Polygon Tube to model this. All my team mates were pretty happy with the result.


Torso- For the torso it was important that the clothes be modelled on it and not independent of it. If the clothes were modelled separately then there would have been one mesh on top of the other. It would have made weight-painting and rigging difficult. The main challenge was to get the arm joint and the chest topology correct. After several attempts I got that correct. Also the crease that divides the sweater from the t-shirt was a problem. The earlier design had the sweater longer that the t-shirt. So the sweater-mesh lay over the t-shirt mesh which would have again been a problem for George. So, then it was decided that the t-shirt would be longer than the sweater.


Hands- The basic hand shape was blocked pretty much alright. The detailing of the fingers did not take much time. It was the modelling and positioning of the thumb that took a lot of tutorial help and time. The palm needed some fixing too. Most importantly to have equal number of vertex to merge it to the torso I had to join five vertices to one point. That might have posed a problem when it was given for animating. Later, Sean advised me to separate the parts of the body so that the deformation would not be weird. This also solved the problem of equal number of vertices required to merge the separate meshes.


Lower-Body and Shoes- Topology of the lower body was quite different because the hip would join at the thighs and the movement of each would be different. I also had trouble of joining the two pair of legs at thighs. The vertex of both the mesh would go beyond each other. I had to delete and join many times to get it right. Also, Sheng suggested that we Lily’s trouser might have a crease at the side to make it look like she is wearing clothes.


I had a fun time making the shoes. It was the only part that did not take much time to model. Plus, there were no changes required to it. It was perfectly made from Day 1.

Finally, I organised the entire scene details as can be seen in the image below. The Outliner was cleaned and named properly. Even, different parts of the body meshes were put into different layers.


Tuesday, 29 April 2014

Lily Model Adjustments

There were several adjustments required after the last bit of tweaking. As a last minute decision,we added ear-muffs to complete her autumn-winter look. It would also help in the story as she is oblivion to what is happening at the background.


Lilly made a sort of a list. I got along with changing all those and the model looks definitely better. I uploaded a copy and everyone found it fine. Thus, Lily’s modelling is complete now.