Wednesday, 18 June 2014

Lowering the Poly-count

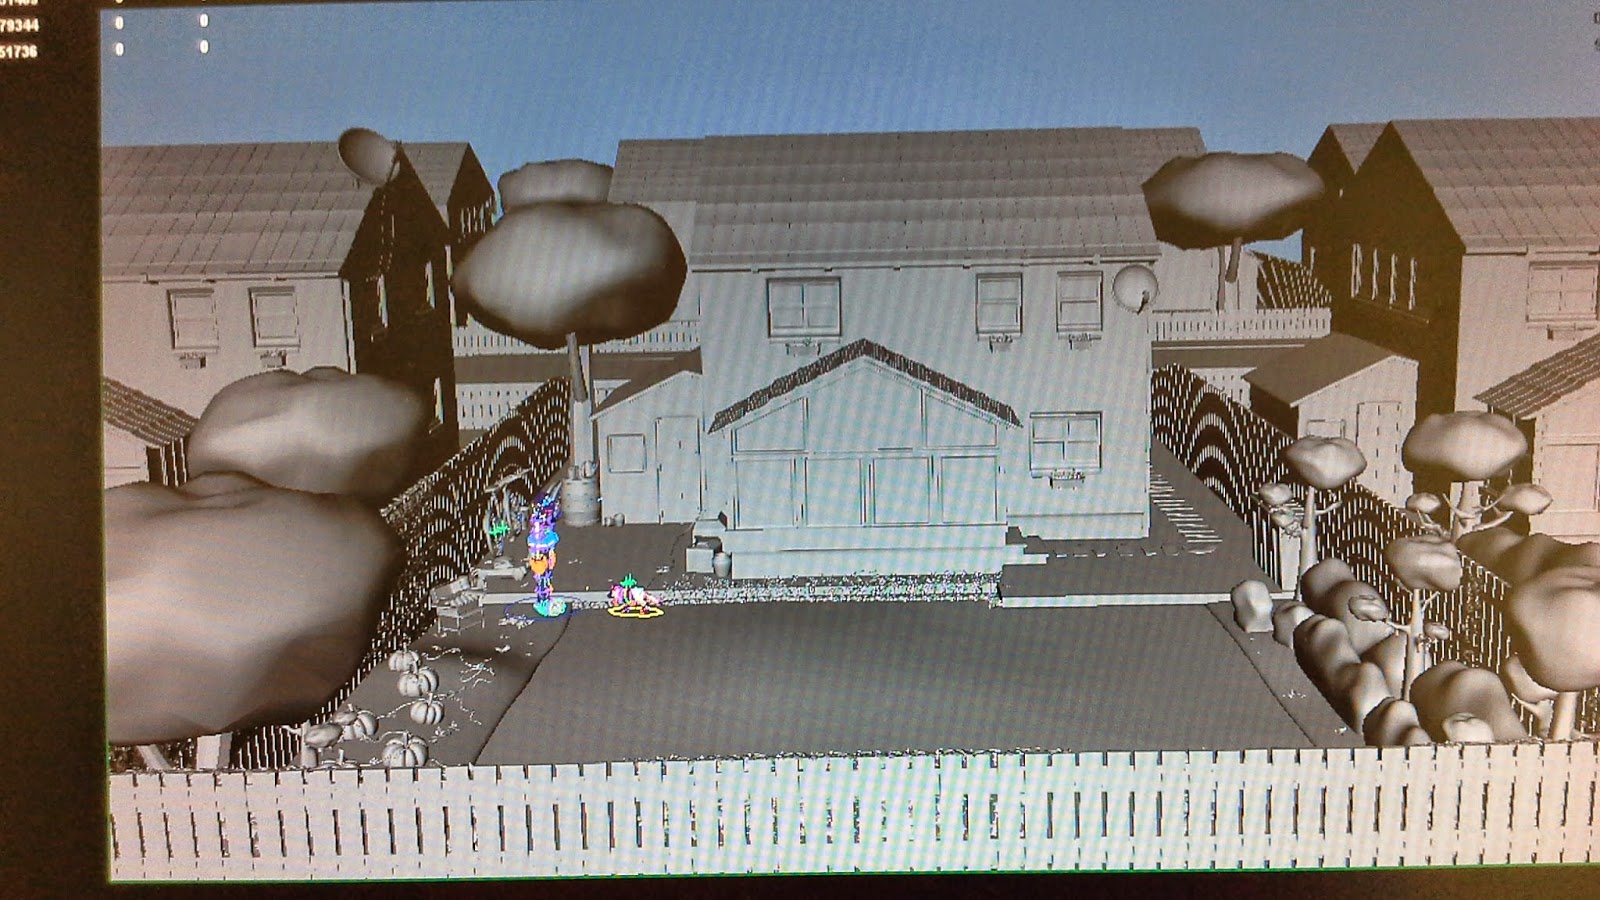
My laptop continued to crash as long as I opened the Environment Maya file. So, Lily and I decided to lower the poly count. She had a look at it and together, we saw places where we could lower it.

We decided to remove the paint effects plants(which I never liked). They had an eccentric poly-count.I replaced them these plants.


I also changed the placement of some plants to suit more to our shots.


I removed the sun over the fluffy cloud and added another cloud. The front fences were aligned. Also, the bushes looked a bit too neat. So I had to make them look haphazard.


I had forgotten to model a few of the props. The saw, hammer and the bird-feeder.


The environment is ready but because there have been so many changes. I will need to Layout the scenes again. Also, I can only proceed with the lighting only when the texturing is complete.

Tuesday, 17 June 2014

Sound

In our meeting with Sharon last week we decided that it would be better if we get the background score of our film sorted before we moved further in the production process. So, we locked down a day when each of us would bring a piece of music that we thought would suit best for our film. 

George had found a very good royalty free music site. So, I looked through this site http://www.bensound.com/ 

It had some really good music. I thought mixing few might bring the sound effect that we were looking for. Usually for mixing music I have used Sound Forge. I think the UI is very convinent and easy to adapt. I didn't have it on my laptop but I found this software- Nero SoundTrax in my laptop and thought I would give it a try. As it was just getting a rough idea for what kind of music we might like I didn't bother searching for some other software.


While mixing these pieces my laptop decided to call strike. I couldn't complete the mixing but I think my team got an idea of what I had in mind. We have squared on 'Funny Song' from the same website above as our base. We will hopefully be building on it.

IBL Rayswitch


I think it is very important to understand sRGB and Gamma Correction tool without which the texture looks washed out with Indirect Lighting. Also, understanding decay as that makes light look realistic.

I tried setting up IBL on the environment for our film TOB. The texture is not complete yet but I needed some texture to test how they might look in the light. The current environment has way too many polygons. So, I used a minimalist environment to see if I want to use IBL for our film.

I downloaded an HDRi set from http://www.hdrlabs.com/sibl/archive.html

As soon as I set up an IBL(for indirect lighting) and a directional light(as sun), the texture got washed out. So, I gamma corrected it using the Gamma node in Hypershade.


So, the colour of the texture was restored but there was still a lot of noise. So I moved on to Rayswitch where we split the light in the environment to bring out the reflection from the sharp HDRi and also to light up the environment through the blurred HDRi.


Now,I think the light in the scene looks fine. I need to work on the shadows that look a little sharp at the moment. It looked a bit difficult when I started lighting but I think I get the hang of it now. Lets see how the entire scene looks once it is textured.


Monday, 16 June 2014

Physical Sun and Sky

I was going through the tutorial of Indirect Lighting which has two options of Physical Sun and Sky and IBL. 
I tried the Physical Sun and Sky first. I needed a scene that was textured. I had many models but none of them was textured. I found the castle that I had made for the Going Live had a shader. So, I used it for testing Indirect Lighting. 

Mental Ray Render

Physical Sun and Sky Render


Gamma Corrected Shader with Sun and Sky


Saturday, 14 June 2014

Layout for Shot 14-20

Shot 14


We see the bird fly off to the fence where her tummy rumbles.

Shot 15


Lily and the dog understand the bird's problem. 

Shot 16


Lily builds a bird-feeder.

Shot 17


Lily builds a bird-feeder.

Shot 18


Lily puts up the bird-feeder.

Shot 19


The bird rushes to it.

Shot 20


Last shot, the dog and the bird happily peck on the their food.

Friday, 13 June 2014

Layout for Shot 7-13

Shot 7


The bird stealthily sneaks the biscuit while the dog is busy digiing a hole to hide it. Its near the pumpkin patch.

Shot 8


The dog turns and the bird swallows the whole biscuit and takes off.

Shot 9


The dog asks for another biscuit. We see the wheelie bins and the patio in the background.

Shot 10


The stand-off. We see the house in the background.

Shot 11


As they fight over the biscuit, Lily is raking. The wheelie bin and neighbour's house can be seen.

Shot 12


Lily comes running to brake the fight. The pumpkin patch and the bar-b-q table can be seen.

Shot 13


Lily picks up the dog and the biscuit. We see parts of the pumpkin patch and the shed area.

Thursday, 12 June 2014

Layout for Shot 2-6


Shot 2

This shot was particularly very interesting to me. It has the tool shed as the background and I had fun modelling all the objects that  makes this house look like a running household.

Shot 3


Moved in Trees and Ivy to show the back garden area. There was a tree that was obstructing the view of the bird in the scene above. So,it was deleted for just this scene. 

Shot 4


The camera angle of this shot covers some of the pumpkin patch area and the rest in the back garden area.

Shot 5


Lily brings in a wheelie bin and we see her doing daily house chores while the dog comes back for another biscuit.

Shot 6


The dog runs after the biscuit and thinks of hiding it under the tree just behind it.


Wednesday, 11 June 2014

Layout for Shot 1

Shot 1 starts with the name of the film with a few clouds in the sky. Rough

clouds were just made for the animatic. So, I modeled a few new fluffy clouds and also set up a sun.


There was a lot that needed to be added in, as it is an extreme long shot where the camera pans down to reveal the entire set where the action takes place. I added a lot of houses that could be the prospective neighbours for our Owner and her dog.


Tuesday, 10 June 2014

VRay

I had never used VRay and was a bit skeptical about using it but then I had heard a lot of about it being the best way to render. So, I watched  a few tutorials online. But first I needed to download the VRay Plugin so that I could play with its settings and check out for myself.

I downloaded a Demo Version from http://www.chaosgroup.com/en/2/downloads.html?s=v-ray-maya

There are a number of limitations when you use this demo version that don't seem much of a put off when you are downloading but when you start using the plug-in and see how awesome it is, you wish you could have the full-version and that puts you off.

While using VRay, the default render settings seemed more or less perfect. There were hardly any changes that was required. It has 3 different preset as in the note below that can be chosen according to the requirement of the scene.


The VRay lights are also different than the lights that are usually in the Light Menu in Maya. There are four VRay Lights but I got as far as trying two of them. 

The VRay Rect Light looks like the Area Light that we usually use in Maya. There are a few differences though.The scaling of the VRay rect light has no effect on the scene lighting. The U Size and the V Size need to be changed to increase/decrease the area covered with light. Also, to have real world lighting effect, there is an option to change the Units of the light intensity in Lumens/ Watts.

The subdivs option throughout Vray Rendering and Light has nothing to do with the subdivs of the geometry present in the scene but is for anti-aliasing the light and shadow effects.

Then, I tried the VRay IES Light. This light is image based where it reads the light and shadow of the image it is assigned and thus gives a very realistic looking light setup.


I downloaded this free set of IES Lights to test. There were 30 different lights with .IES extension. I just needed to assign one that suits best to my scene to the IES light created and placed in the scene and it calculates light on real world physics.

I was absolutely enjoying all the effects and realistic looking lighting when John M told me that we do not have it in our studio machines or in the render farm which I got confirmed from Sean.I cant render the entire file using the limited demo version on my laptop alone. So, I now have to leave this amazing option and look at other options that are available. IBL most probably.


Monday, 9 June 2014

Chirpy ready for rigging!!

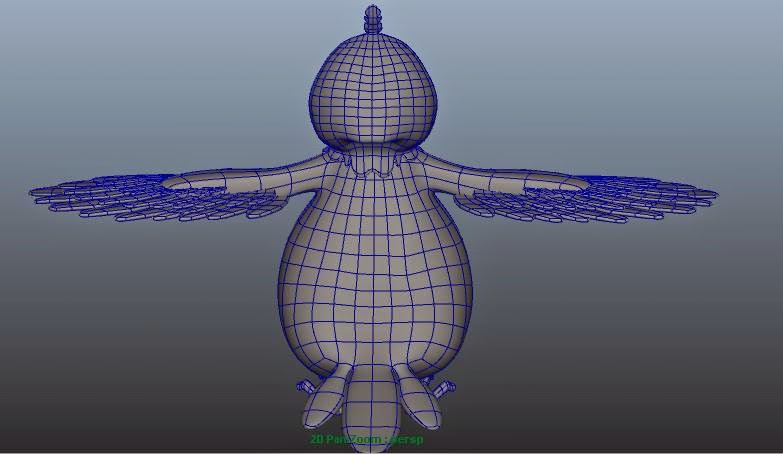
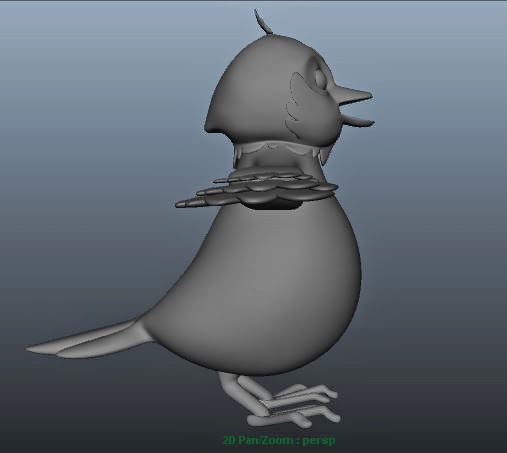
Here, are few images of Chirpy with her Topology. George and Lilly had pointed some changes which have corrected in this final model.


 I  had modeled the wings back to front. So I changed that.


There were a few additional faces that needed deleting. Lilly helped me locate them. 


Her feet were quite webbed. So that was also changed.

She is complete!!

Thursday, 5 June 2014

Chirpy's Body and Wings

I started modelling the body and wing area which did not seem difficult when compared to her head. I thoroughly enjoyed making her wings and adding the feathers. Sheng's art had one layer of feathers. However, I though her wing looked very bare so I decided to add three layers to give her a fuller wing.


I had thought,I just need to stitch the second half of the body and the bird will be ready to rig. However, Lilly and George pointed out some minor changes that I will hopefully complete within this week.


Tuesday, 3 June 2014

Chirpy's Head

After a day's of work with Chirpy's head. This is where I left her.


 I used the same techniques with the eyes that I used for our human model Lily. However,the topology of the beak area was a challenge. I tried finding some tutorial on digital tutors but in vain. Then I just Googled for some images online on bird topology. I found references, and tried to incorporate some while used my experience for others.
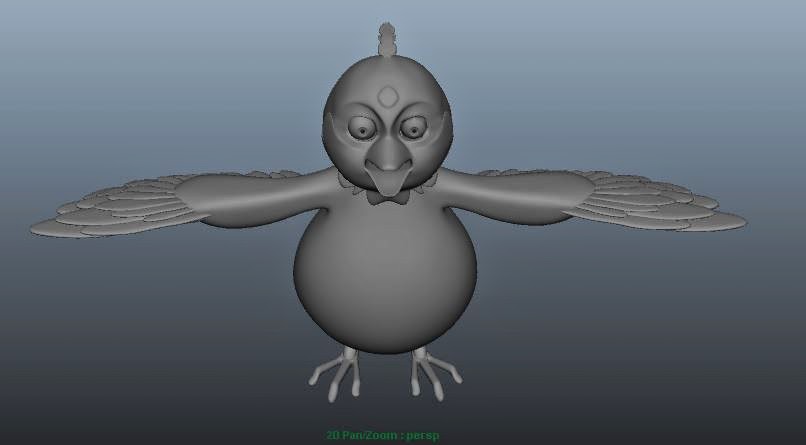

 My team is very happy with the results and so am I! I especially enjoyed modelling the feathers around her face. This gives her so much character,I think.( Or, simply makes it look like a bird)

Thursday, 29 May 2014

Bird Blocking

Sheng's Character Designing for our bird- Chirpy


Blocking of the bird was pretty simple. I cut the above concept in Photoshop and imported the images in Maya. Thereafter, I created simple polygons to start detail modelling.